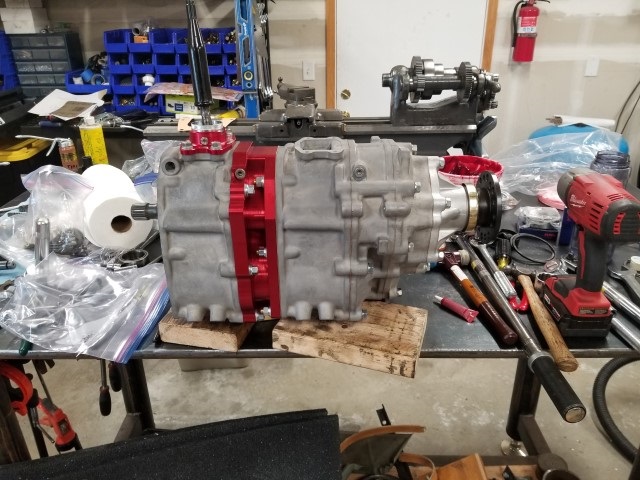
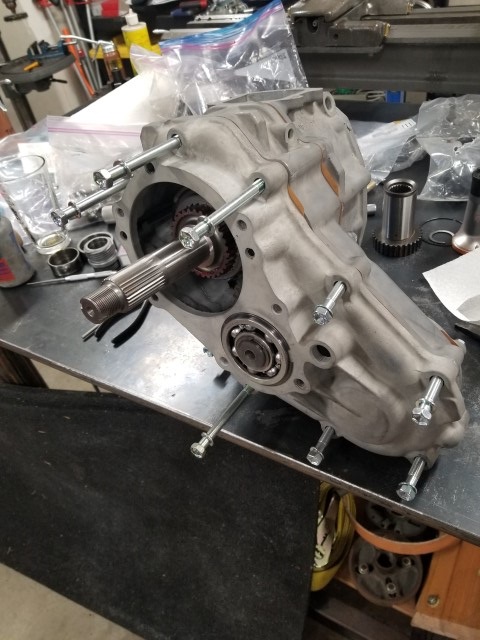
Greetings! Here is a quick write up of how to put together a Toyota Gear Drive RF1A Transfer Case. Well kinda, this is a Marlin Cralwer Doubler with 23 spline 4.7 low range gears in the rear reduction housing and 23 spline 2.28 in the front reduction housing, and some other goodie upgrades
The RF1A came behind 22R(E) engines from 1979 to 1995 with a 21 spline input and a 2.28 reduction. If you have a 22RET or factory turbo with a R151 manual transmission, everything is the same, with the exception of a 23 spline input shaft.
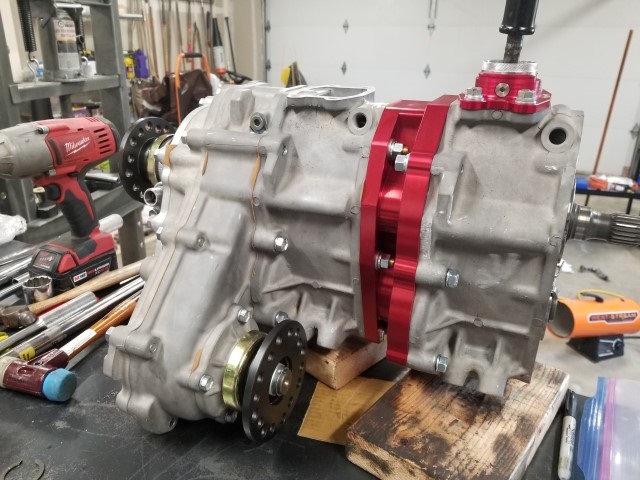
When building a doubler, the rear most case must be a top shift case. These are easy to tell apart from the forward shift case as the top shift will have a shifter on the T-case itself were a forward shift will be on the tranmission.
I would ALWAYS recommend the rear most case be a 23 spline unit. With the front case reduction housing is engaged, rpm is lowered but torque is increased. The 23 spline unit is larger and most contact area, allowing it to survive.
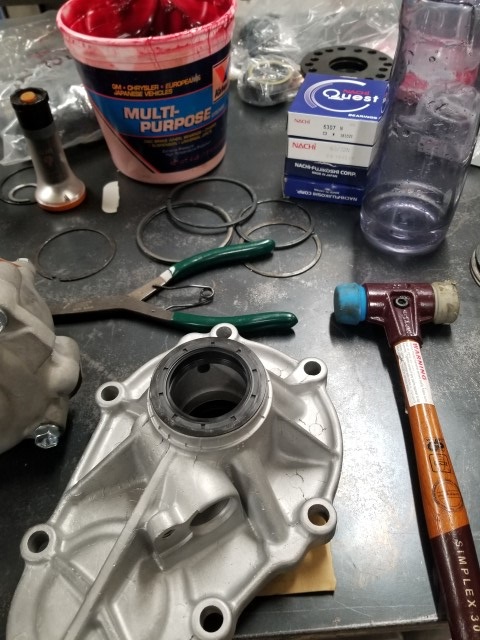
12mm, 14mm torque wrench, dead blow hammer, ball pein hammer, AND MORE<\p>

.jpg)
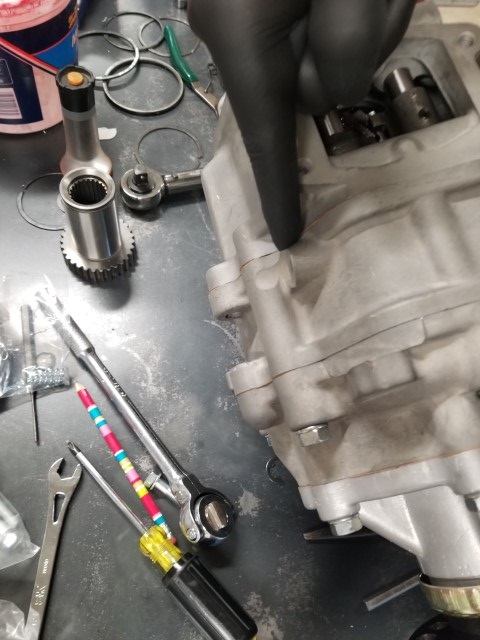
Above you can see the various upgrade parts. A Marlin Crawler 30-Spline Chromoly Front Output Shaft, 30-Spline Chromoly Rear Output Shaft, 4.70:1 Competition Chromoly Gear Kit, and a complete rebuild kit.
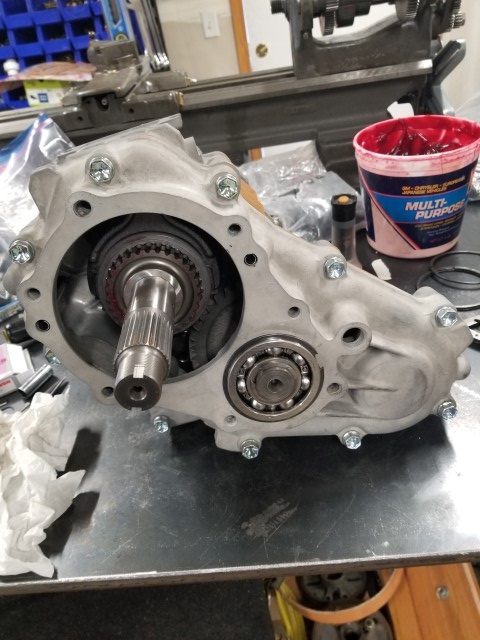
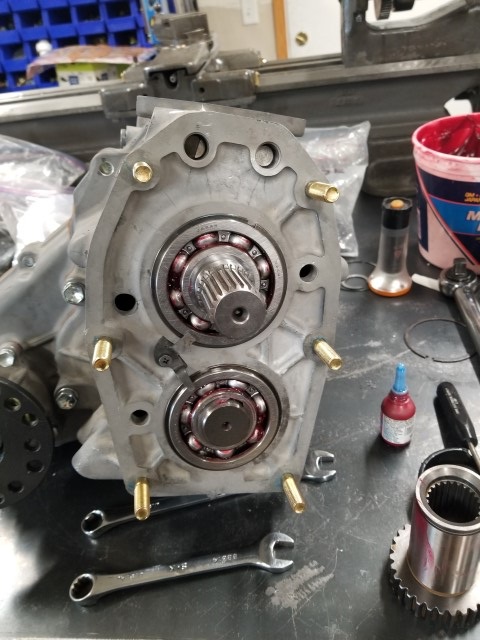
The factory housing, was disassembled, cleaned and blasted with glass media. This gives a nice finish and really cleans everything up.
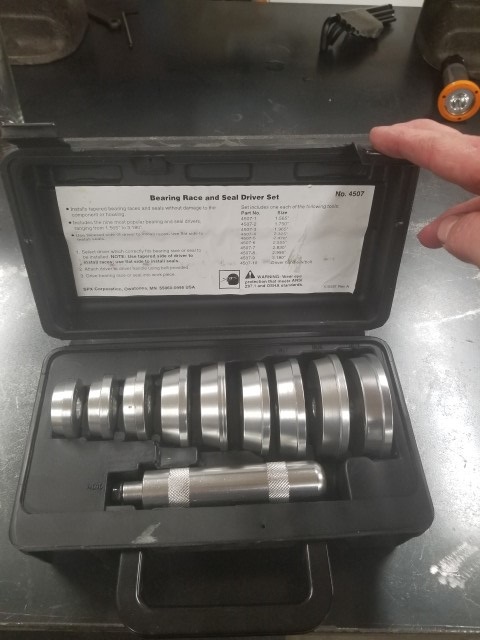
New bearings were pressed into the housing. This can be done with a hammer or with a press. If useing a hammer take car not to hit the bearing with a metal hammer. Use a plastic deadblow or aluminum seal driver to prevent damamge.
.jpg)
.jpg)
.jpg)
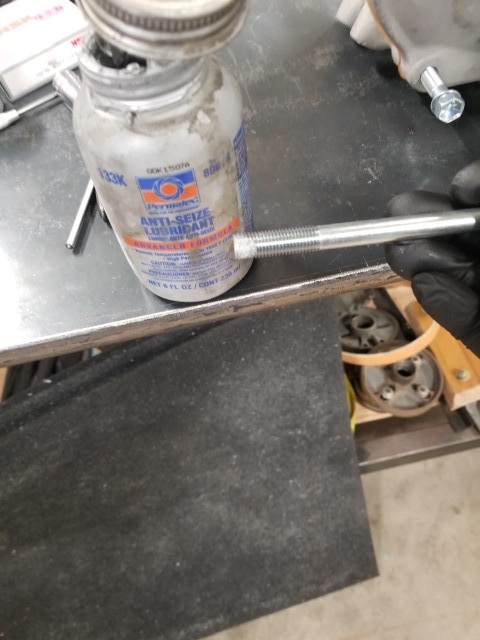
I do put a little anti-sieze on all the steel bolts that thread into the aluminum. This just helps get an accurate torque and makes it easier to take things apart.
Below is a copy of the FSM for the next few steps
.jpg)
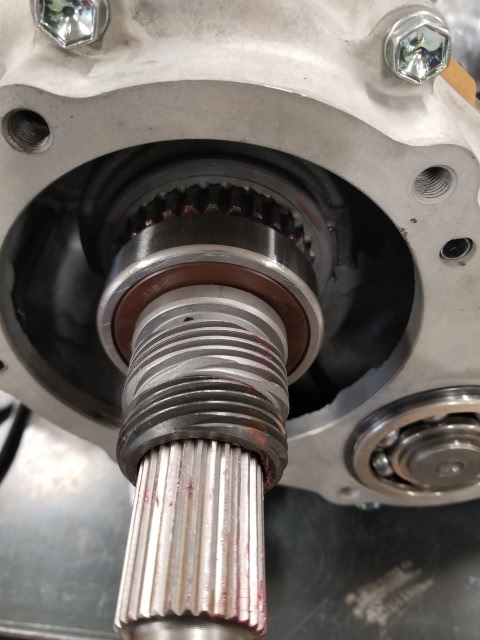
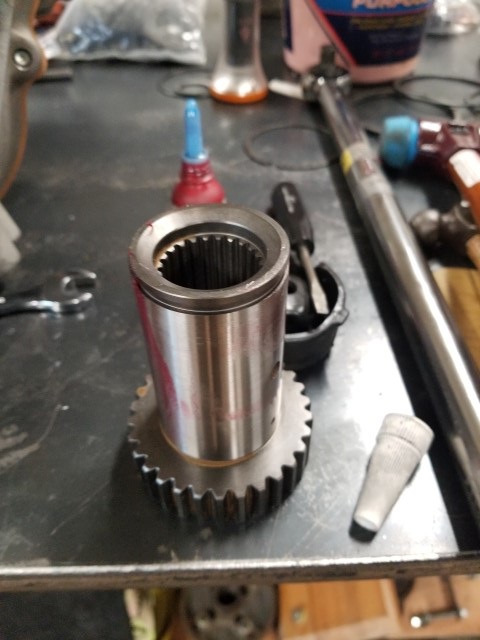
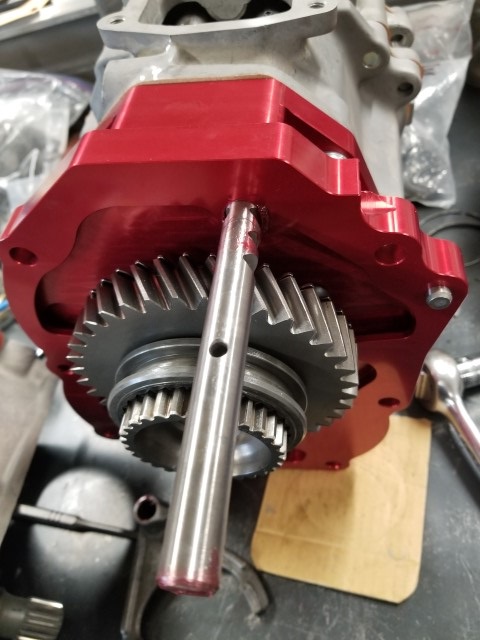
Here you can see the 30-Spline Chromoly Rear Output Shaft. RCV also makes a upgraded rear output shaft, unlike the Marlin unit, it is not any larger, but is made from a better material, wich can make for a quick and easy swap. I would always recommend upgrading the output shaft when building a t-case as this can quickly become the weak link. Both Marlin and RCV are quality items
.jpg)
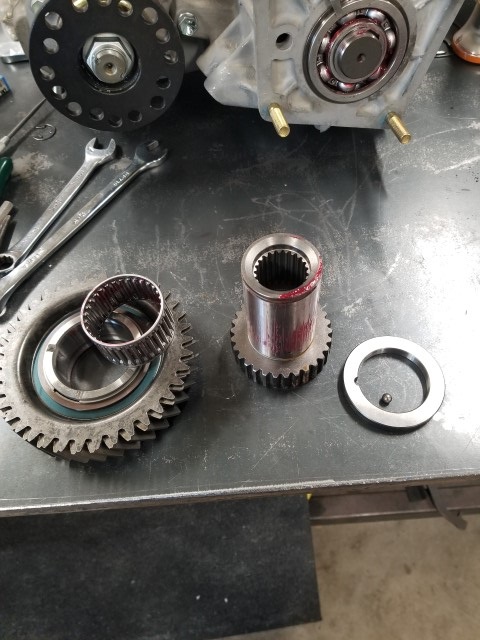
We start by putting some assembly grease on the cage bearing and slipping it onto the output shaft.
.jpg)
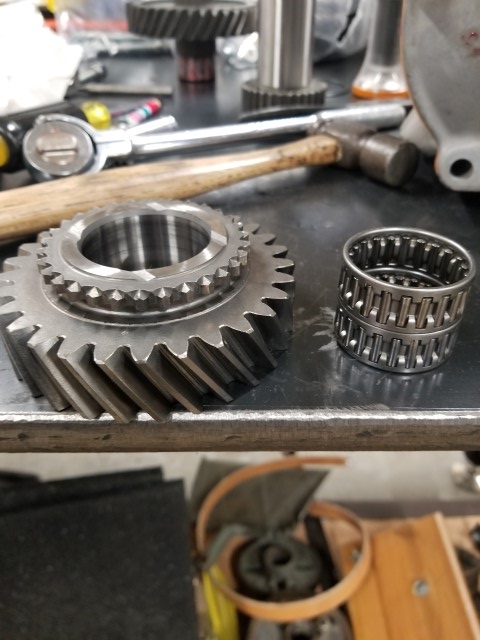
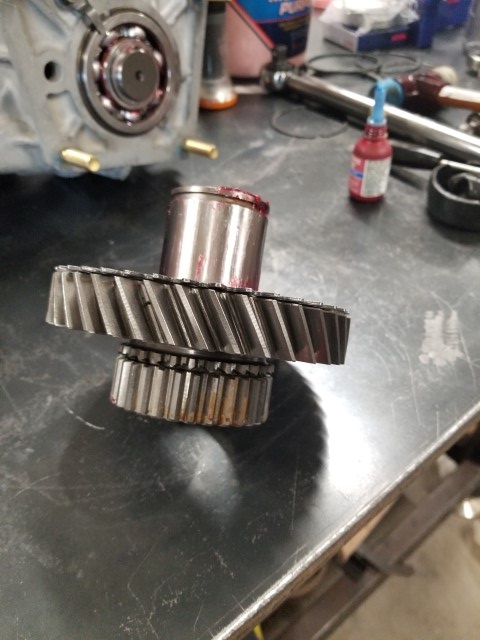
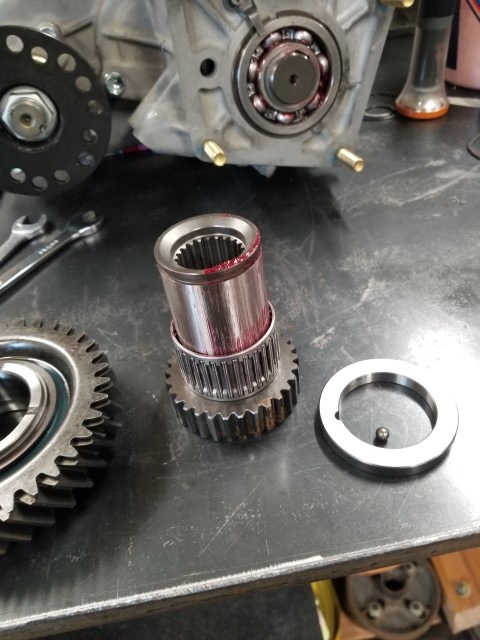
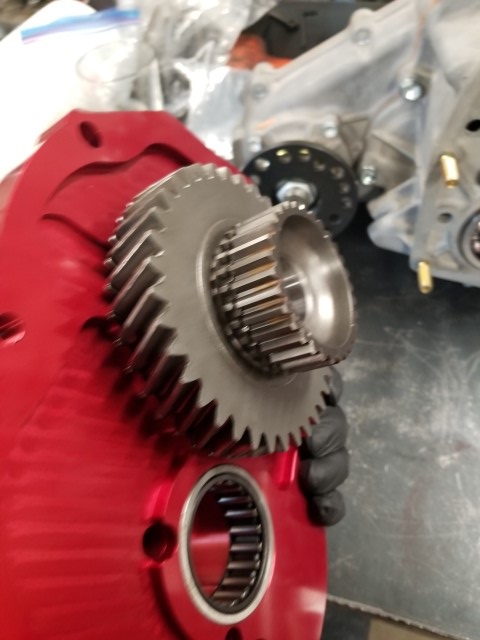
Next slip the new 4.7 gear onto the output shaft. Take care it is properly oriented.
.jpg)
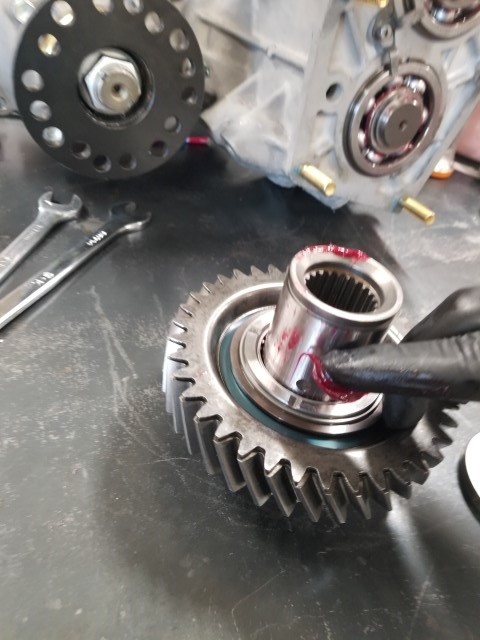
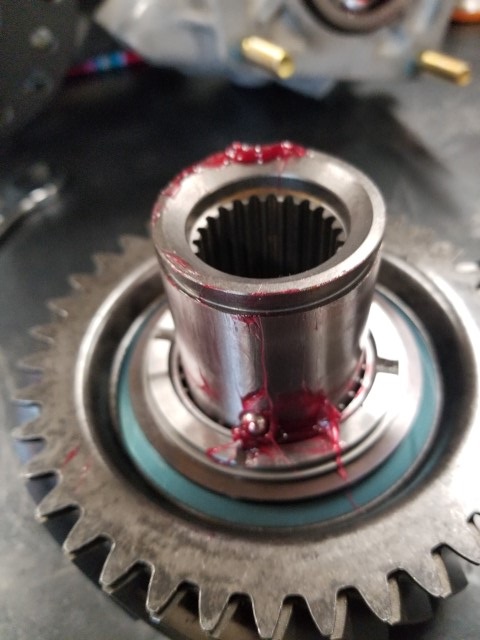
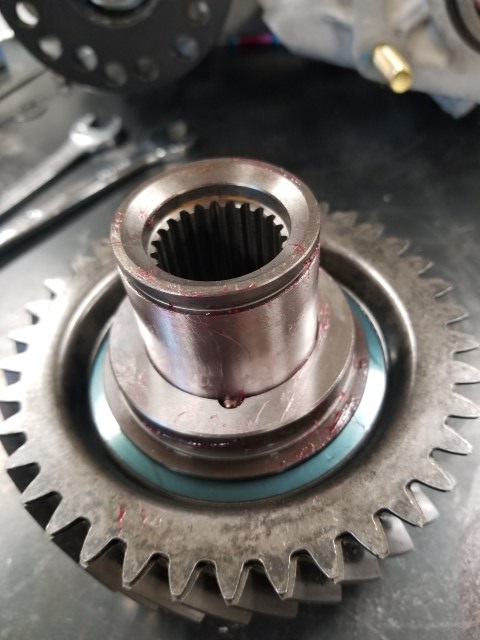
Now we add some grease to the detent pocket(the grease hold the detent in place) and inset the detent. Followed by installing the thrust washer onto the output shaft, making sure to align the detent
.jpg)
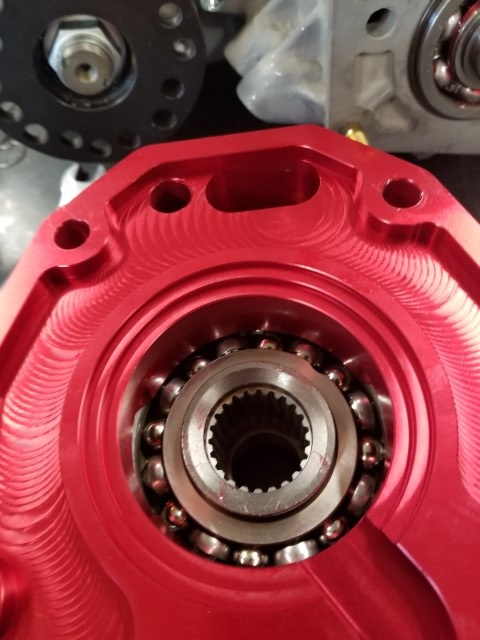
Now press the main output shaft bearing into place, and secure it with the C-Clip
.jpg)
.jpg)
After the main output shaft bearing and clip are insalled interst the output shaft and bearing into the intermediate plate. Once through install the snap ring onto the bearing.
.jpg)
.jpg)
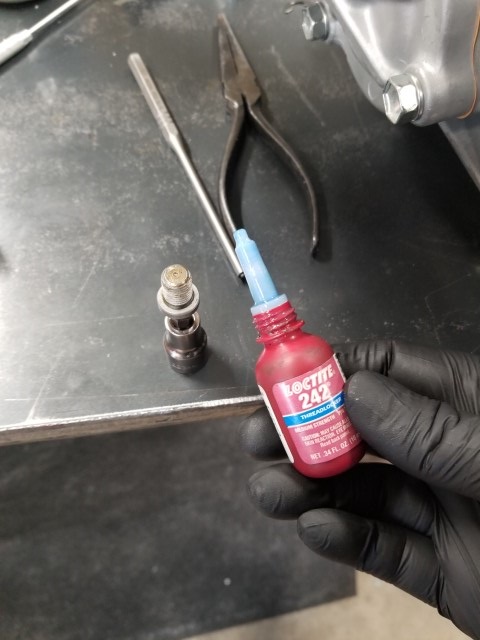
Next install the bearing retainer torquing the bolts to 13 ft-lbs, I like to use some Loctite 242 (BLUE) on these bolts to make sure they don't back out.
.jpg)
.jpg)
Its always a good idea to have your torque wrench calibrated from time to time.
.jpg)
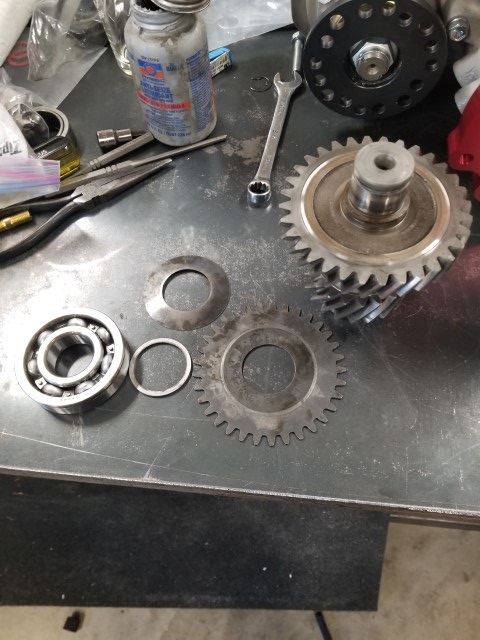
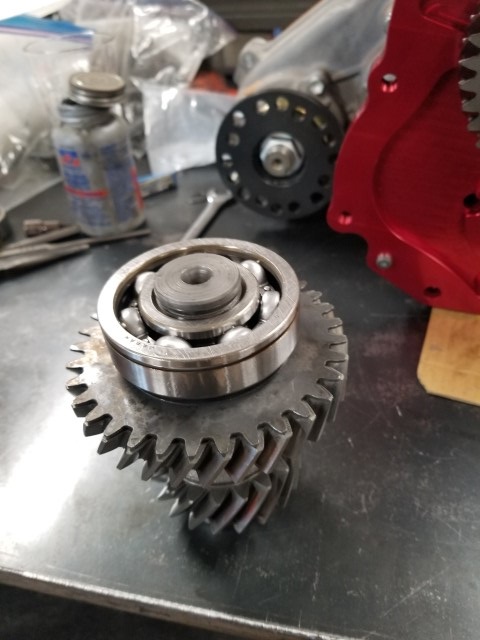
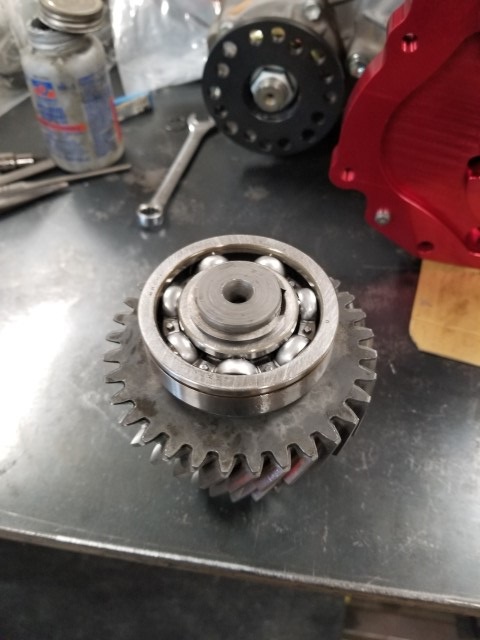
Now press the new bearing onto the input gear(Nachi, 6307N) and counter gear (Nachi, 63/32N) and install their proper c-clips.
.jpg)
.jpg)
.jpg)
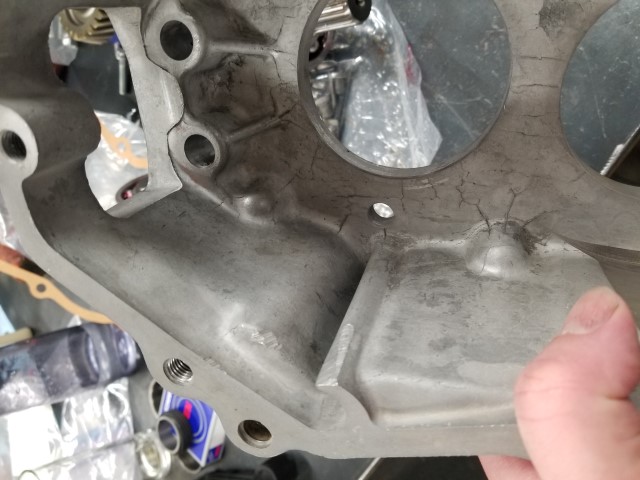
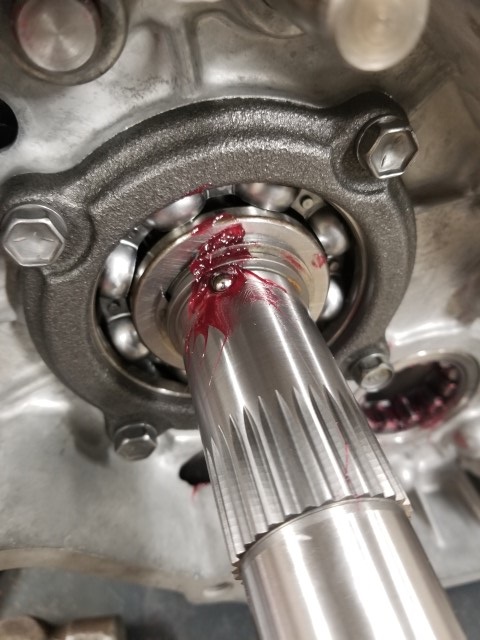
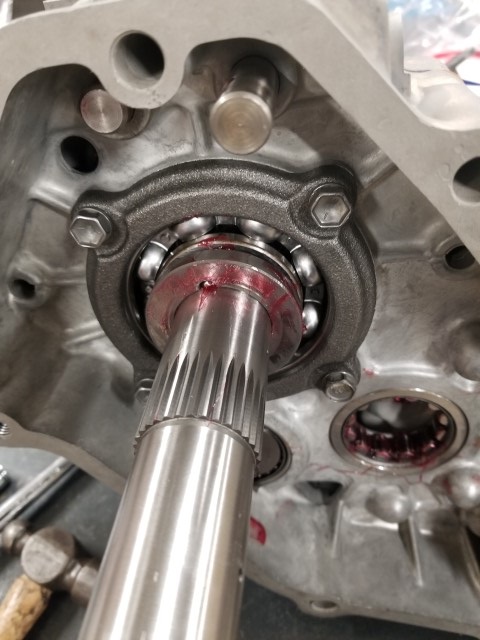
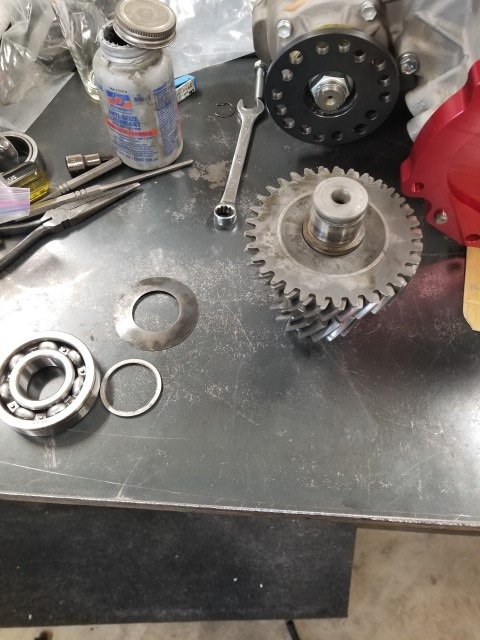
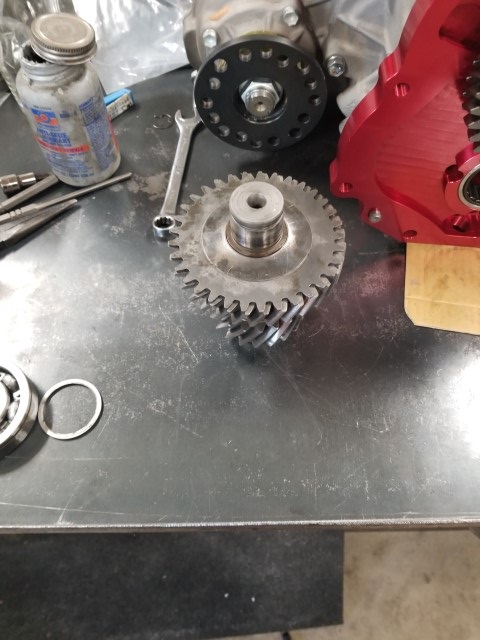
The 4.7 low range gear is physically bigger then the factory 2.28 gear set. To make room the reduction housing must be clearanced. I was able to use a mill to clearance the lower section, which makes for a clean job. It can also be done with a grinder. Grind a little, check the fit and grind a little more.
On some cases the top oil rails might need to also be clearenced. I have installed 4 or 5 sets of low range gears and only 1 of them needed the clearance. Make sure you check! I like to use dykem or marking fluid to check for contact. It took several tries to get things to fit on this gear set.
.jpg)
.jpg)
.jpg)
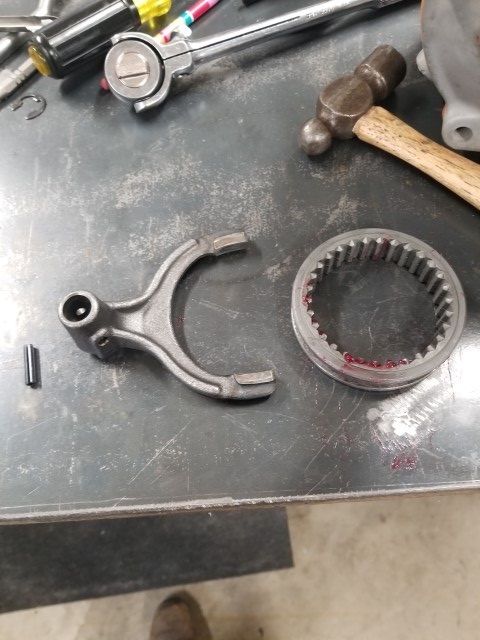
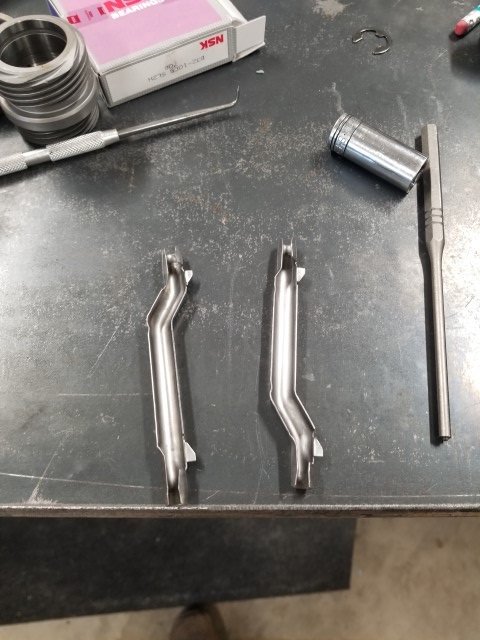
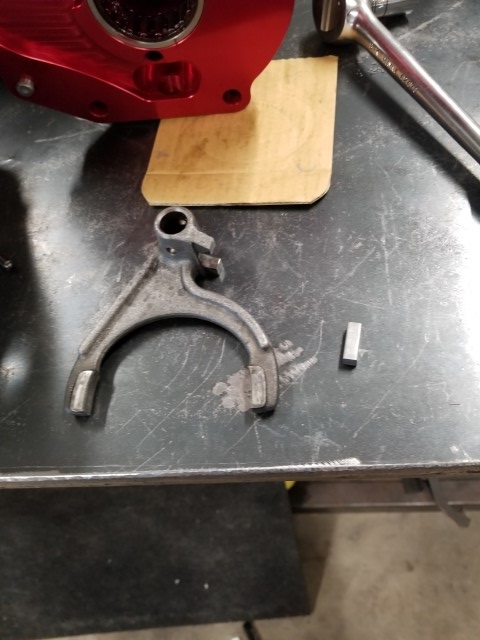
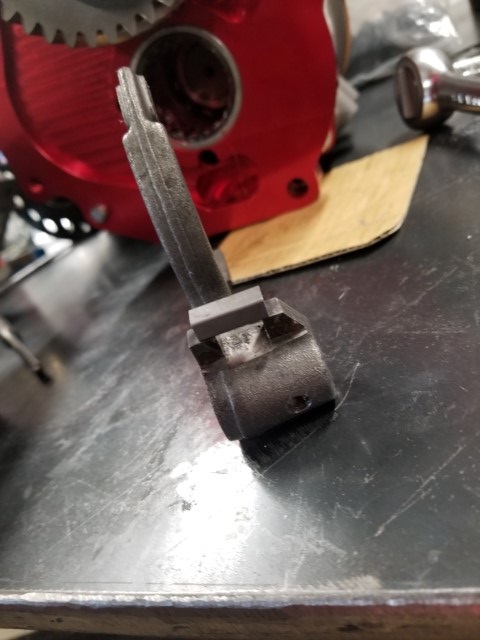
The shift forks also need to be clearanced for the larger gear. This can take time, grinding and test fitting. I try to leave as much of the material as possible, but want a little extra clearance, just to make sure everything clears. Be careful when installing the roll pin. They also need to be ground, installing a full length pin will interfer with the gear.
.jpg)
.jpg)
.jpg)
.jpg)
.jpg)
.jpg)
.jpg)
.jpg)
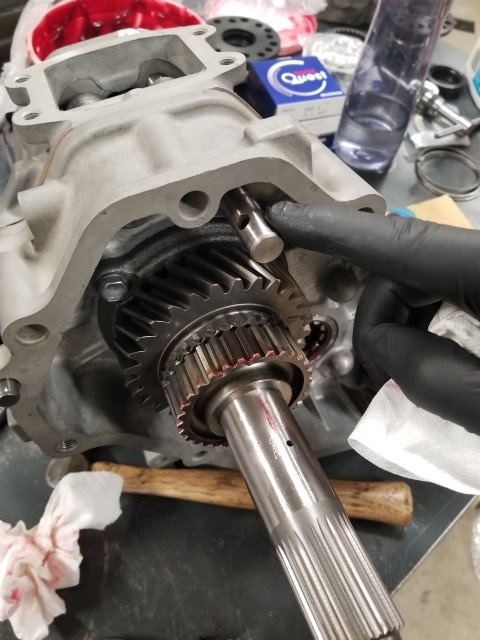
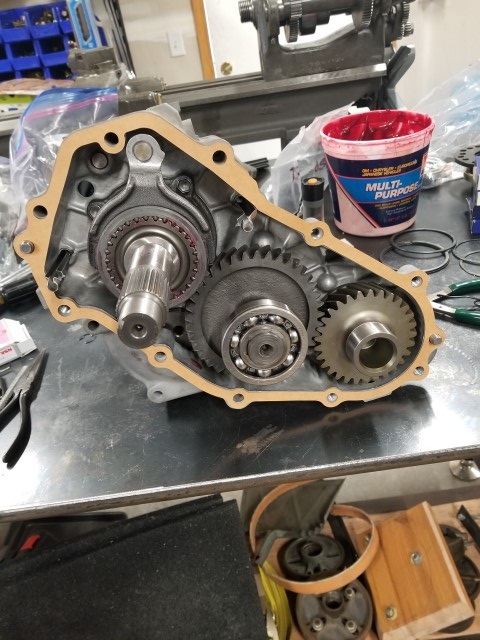
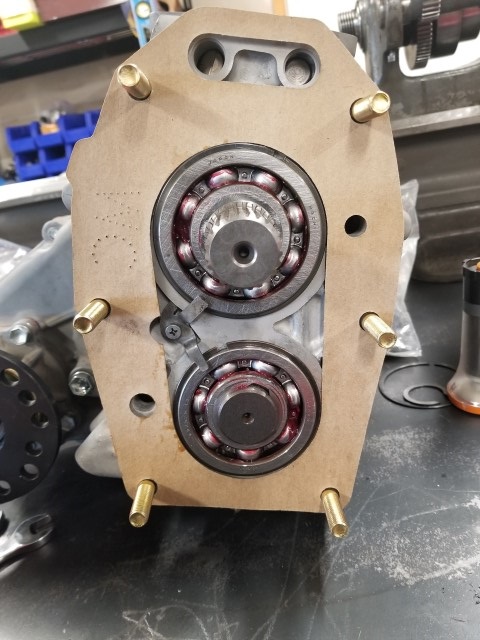
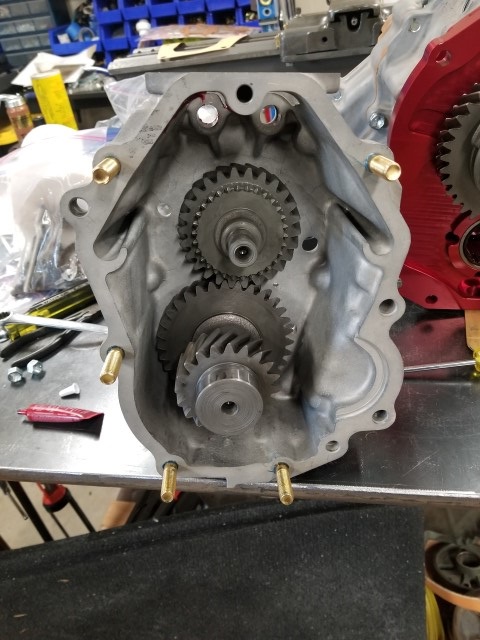
Once we clearanced everything, install the input and counter gear into the reduction housing. Install the input first and then the counter gear. I then install the gear retainer clip. This just keeps the gears from sliding too far forward when moving the case around. Some cases DO NOT have this clip.
.jpg)
.jpg)
.jpg)
.jpg)
.jpg)
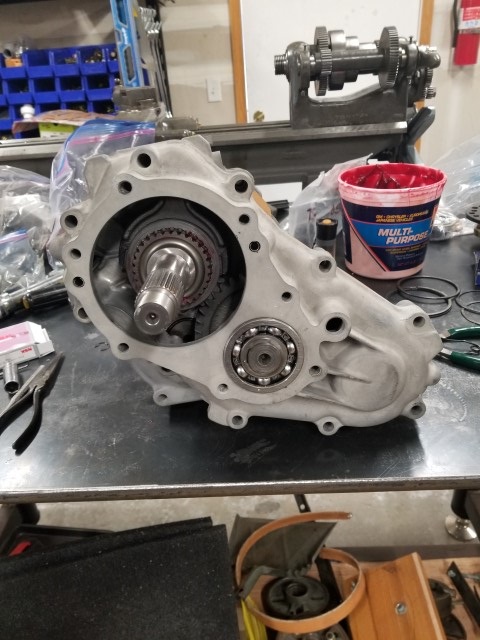
Next put some grease on the input cage bearing and slip it into the output shaft pocket. The grease will hold it in.
.jpg)
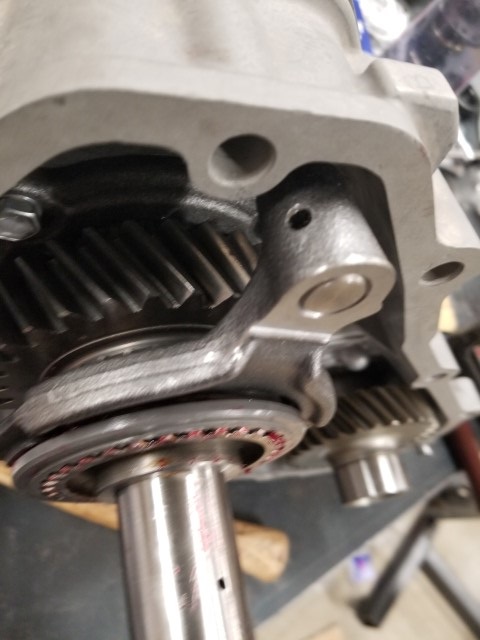
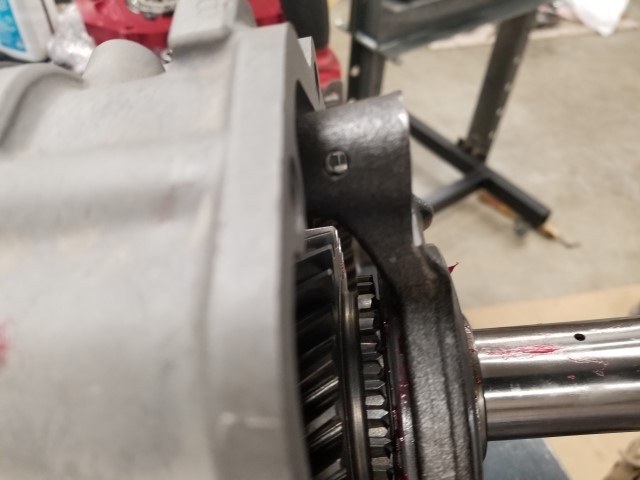
I then install smaller c-clip on the 4wd shift rod that comes with the kit, and then install the front shift fork and the rear shit rod into the intermediate plate. You can see the detents in the shaft and the proper orentation. The single detent on the inside of the rail operates the innerlock and the three on the outside are the High, neutral and Low detents
.jpg)
.jpg)
.jpg)
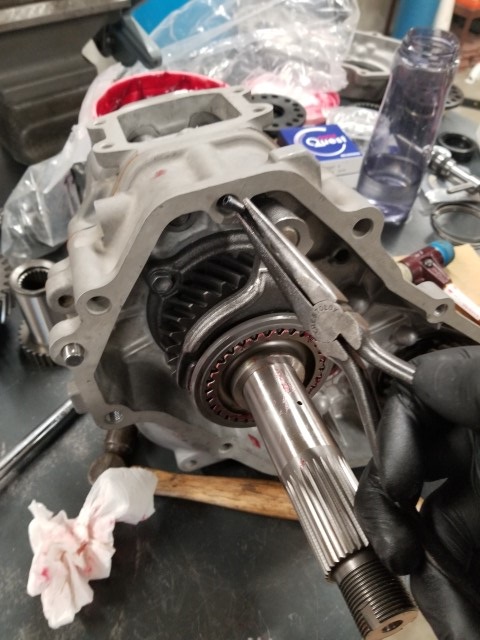
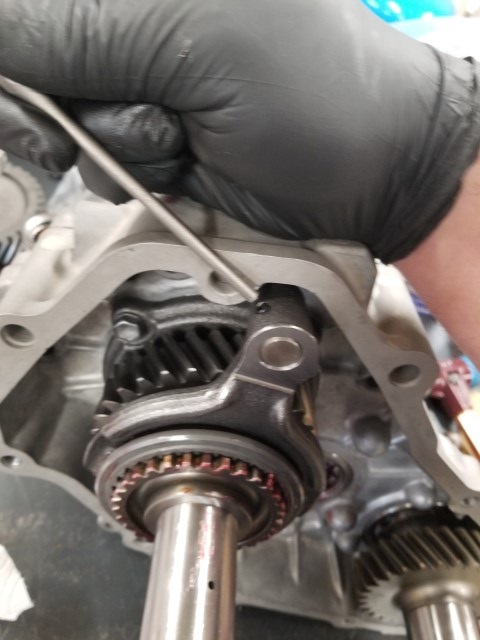
This is the inerlock pin and must be inserted in between the two shafts when installing them. This prevents you from having low range 2wd. If you want low range 2wd or plan on installing twin stick shifter leave this out. If you leave it out and don't use twin shifter is it possible to have the shifter slip out of the shift pattern. This will make it so you can't shift the t-case until you fiddle around and slip it back in. To install it simply install one of the shift rods, slip the interlock in the opposit detent retainer and push it in. Then install the other shift rod.
.jpg)
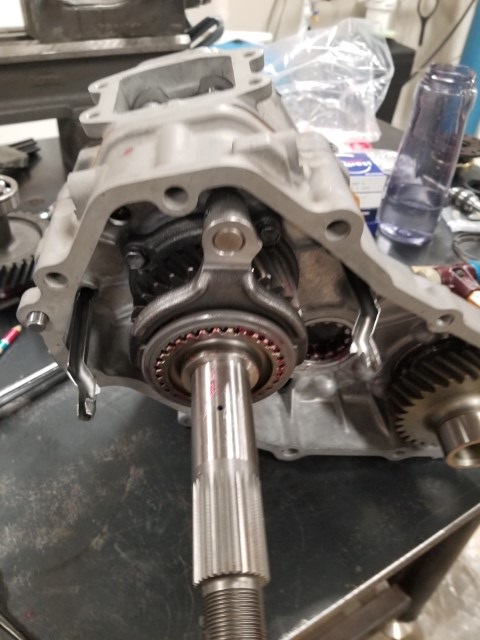
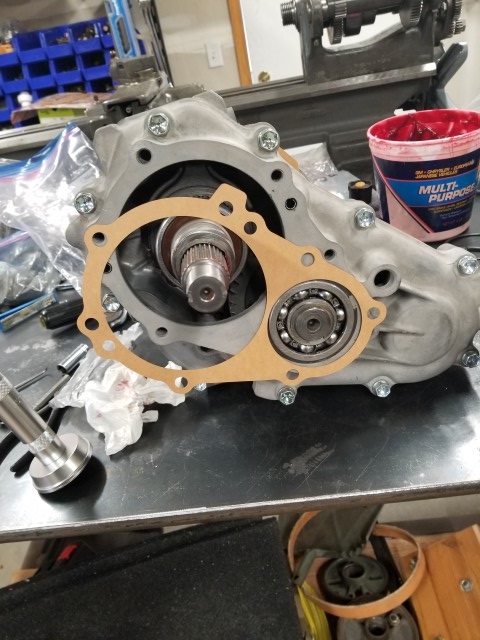
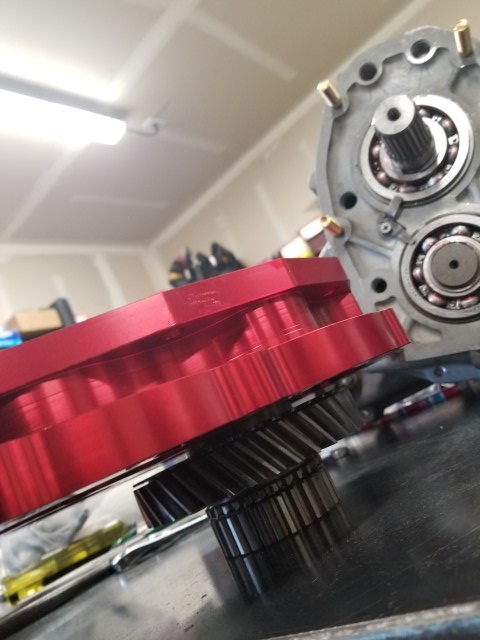
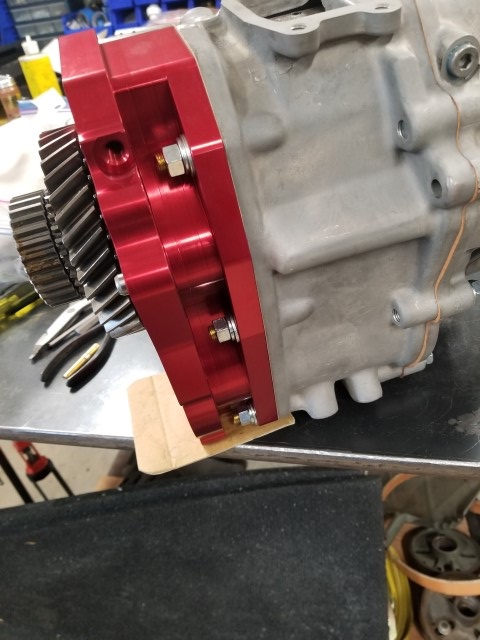
Now that the shift rods and low range fork are installed, put the gasket in place, and slip the reduction housing on. Install the two front bolts. Take care when installing the bolts as there are two different length bolts, 47mm and 49. The 49mm bolts is the one used to install the oil sling cover bracket. If you don't have the bracket anymore(as most people take them off) make sure to use a spacer or relocate the longer bolt, as it can crack the housing if you just thread it in.
.jpg)
.jpg)
Next page of the FSM
.jpg)
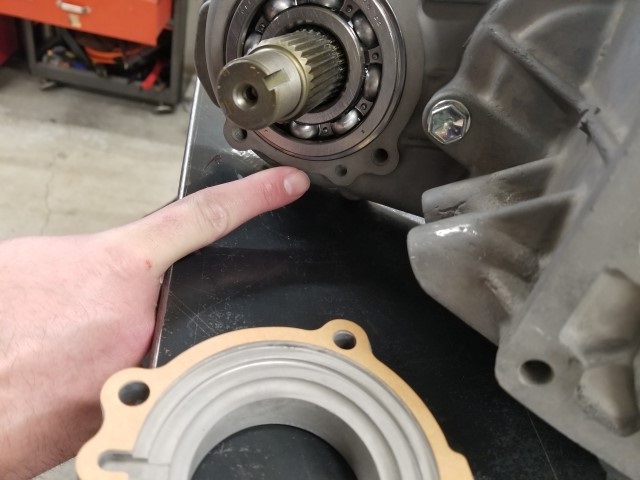
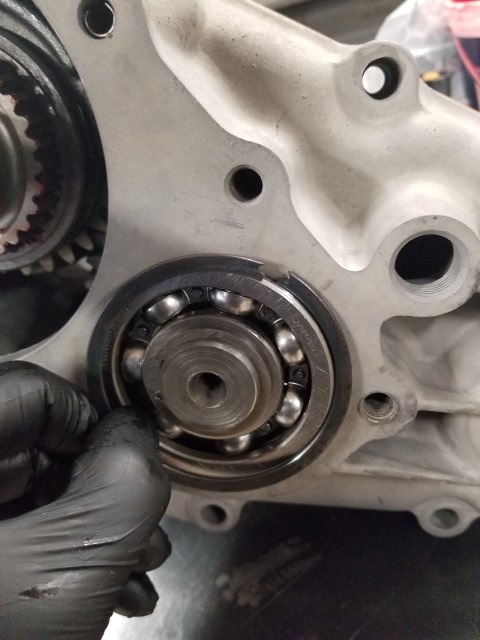
Press new bearings on the front output and the idler gear.
.jpg)
.jpg)
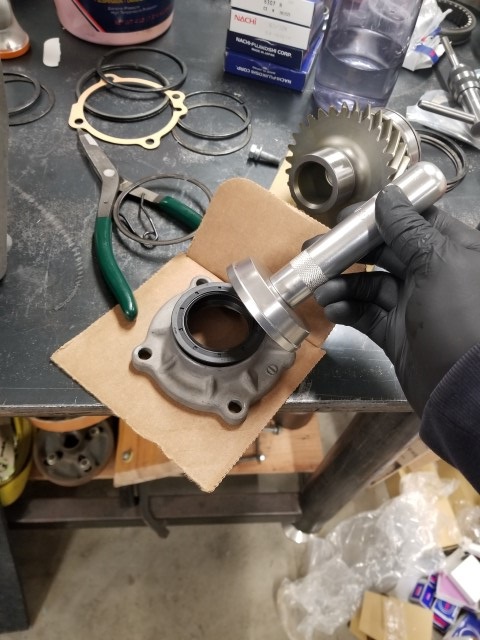
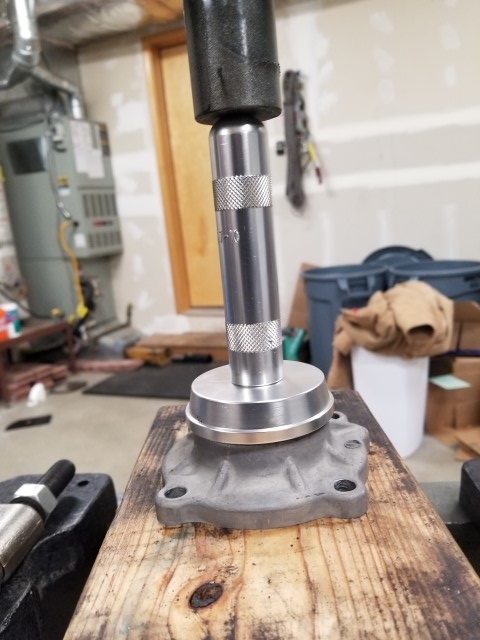
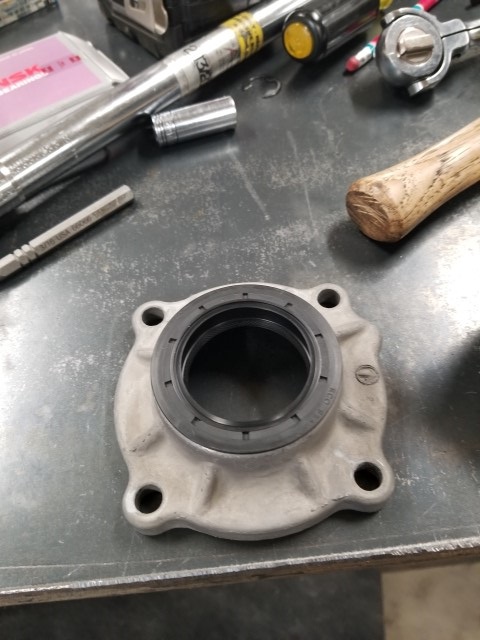
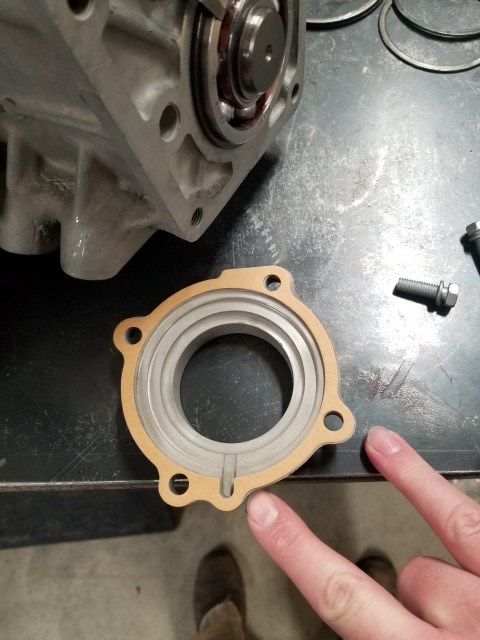
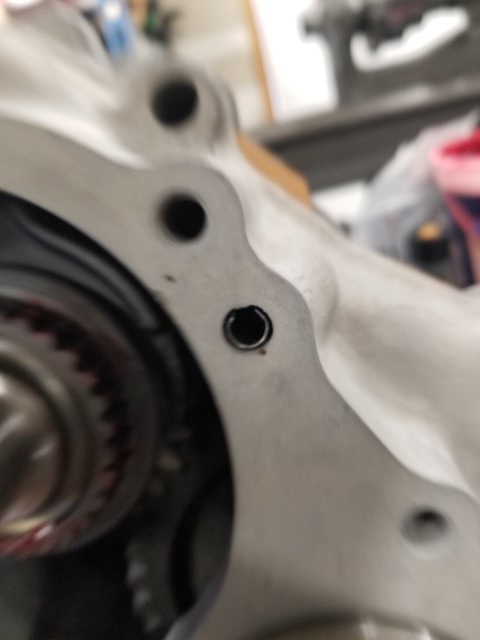
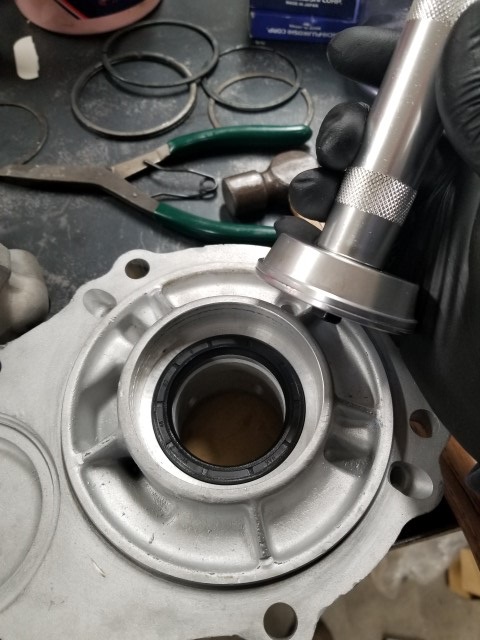
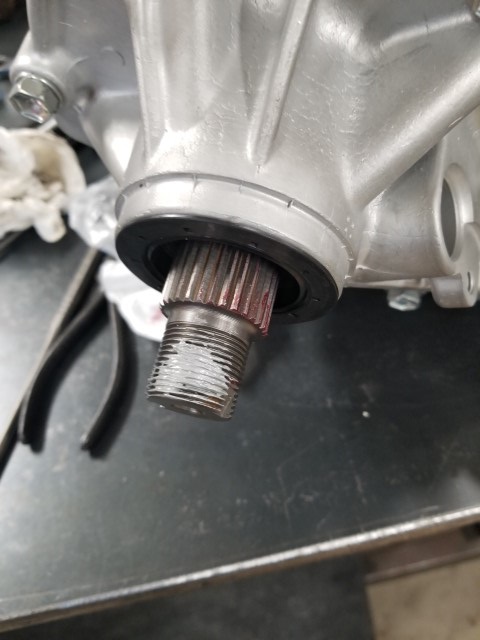
Press or drive a new front out seal in the front bearing retainer housing
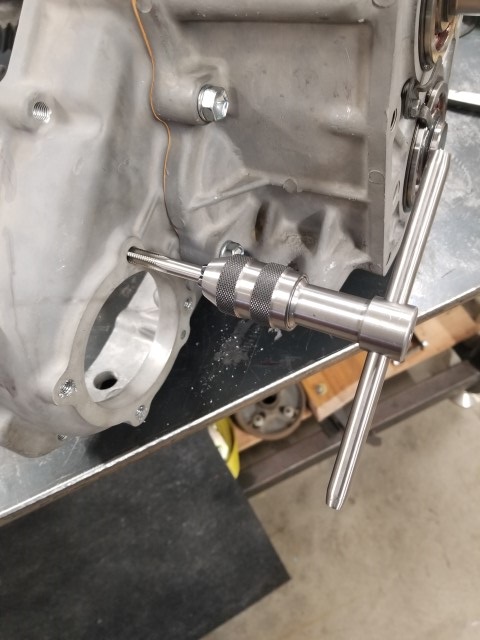
I noticed some trash in the threads so I chased them with a tap. I try and chase all the threads
Install the front output into the intermediate housing along with its snap ring.
.jpg)
Next install the bearing retainer and gasket. Make sure your gasket and retainer are oriented correctly for the oil hole. The bolts are torqued to 13 ft-lbs
Install the detent and thrust spacer that comes with the Marlin Rear output kit. Again a little grease will keep the detent in place.
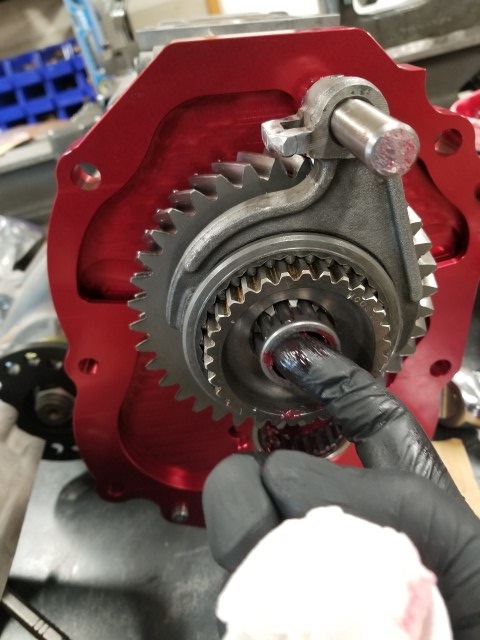
Next install the cage bearing and 4wd selector gear. This is followed by the hub sleeve. I used a dead blow to tap the hub sleeve on. The marlin kit comes with a new Hub sleeve which can only be put on one way. Make sure if you are using the factory hub sleeve you put it on in the correct orientation.
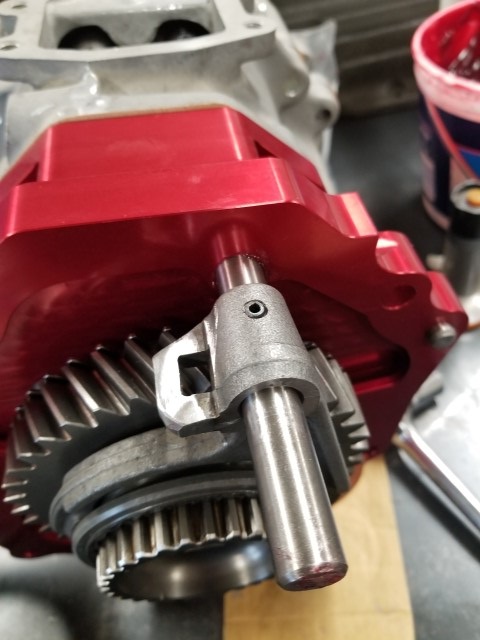
Slip the 4wd shift fork and hub onto the shift rod and hub sleeve. Drive the roll pin in to hold the shift fork.
Next page of the FSM
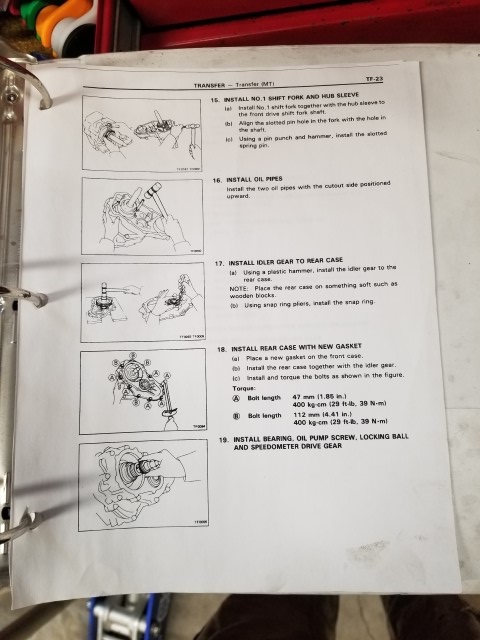
Install the oil channels. they simply tap into the housing. Make sure they are properly oriented and the key slips into the notch in the housing.

Install Idler gear into the housing
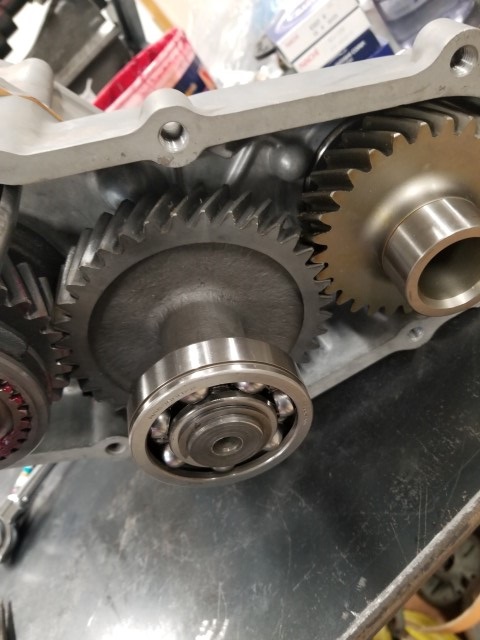
Install gasket and rear housing. One the housing is on, install the idler snap ring. Notice where the different length bolts are placed. Bolts are torqued to 29 ft-lbs. Make sure oil channels poke through.
Next slip on the rear output bearing, Oil pump and speedo gear. These parts are modified for the Marlin Rear output kit. If you are using the factory or RCV shaft, replace the O-ring in the oil pump and make sure to put the speedo detent in. These are eliminated with the Marlin kit.
Now install the oil pump seal. It presses into the rear most housing section. Make sure to add a little oil or grease to prevent a dry start.

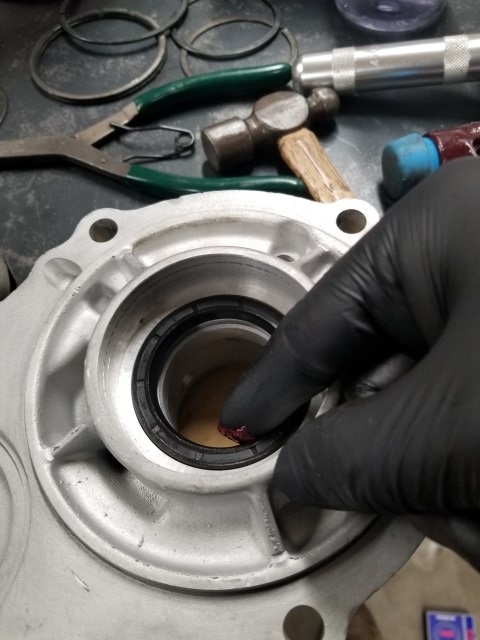
Flip the housing over and press or drive the rear output seal in.
Place the gasket in the housing and install the rear housing. Bolts are torqued to 29ft-lbs
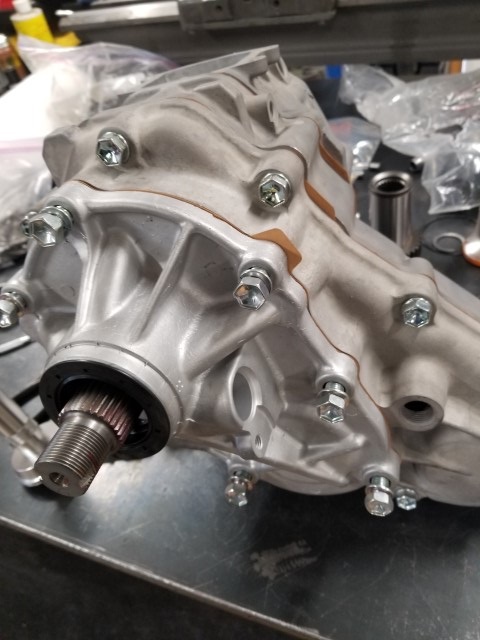
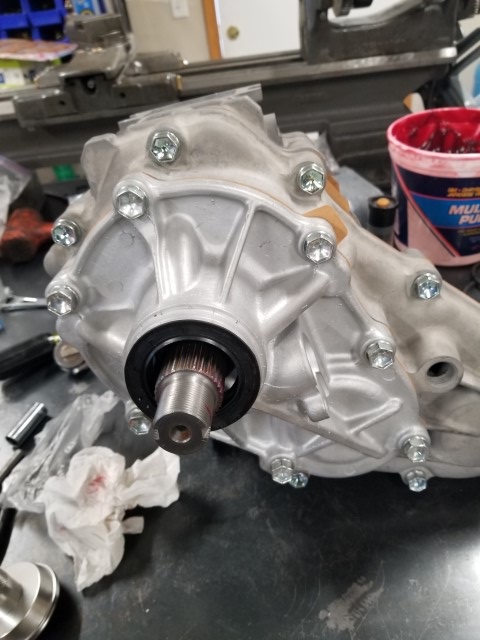
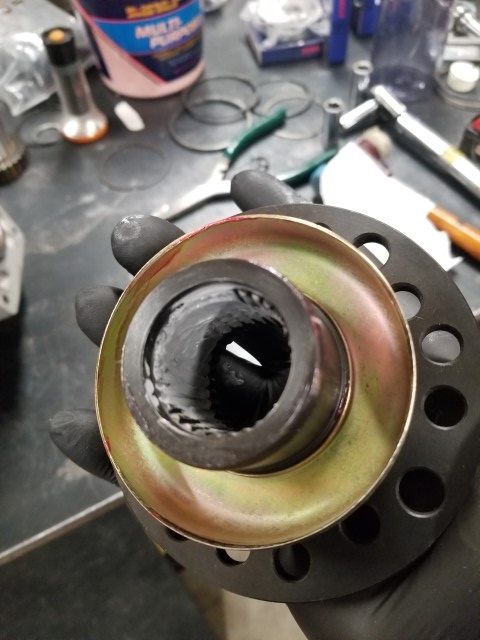
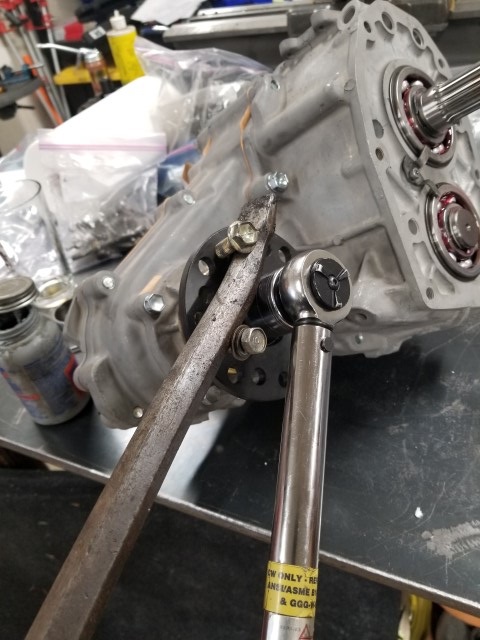
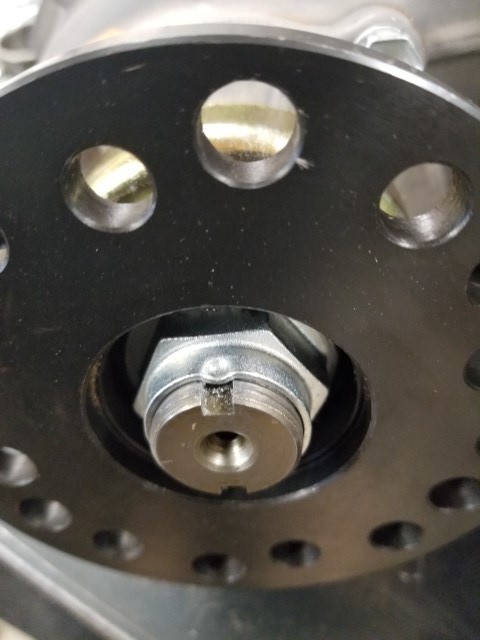
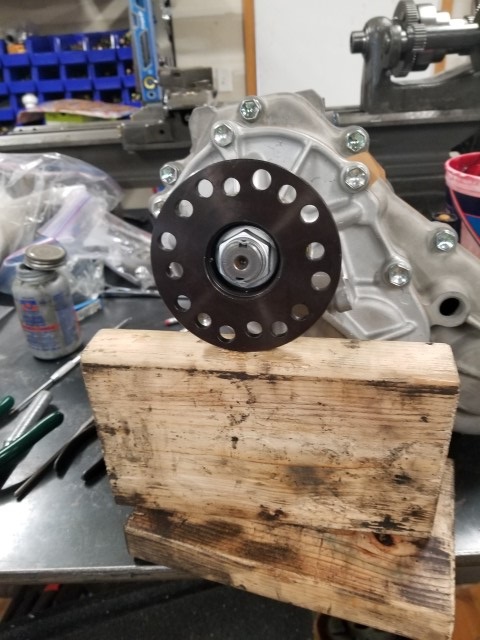
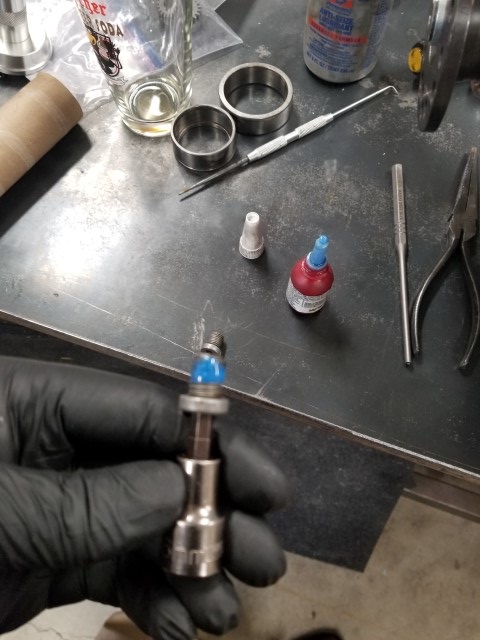
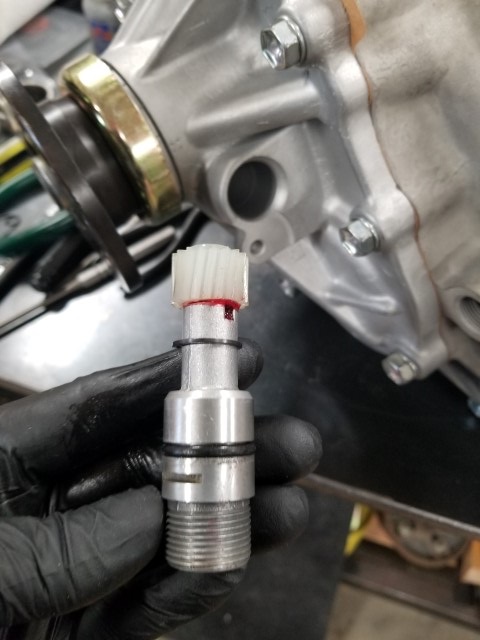
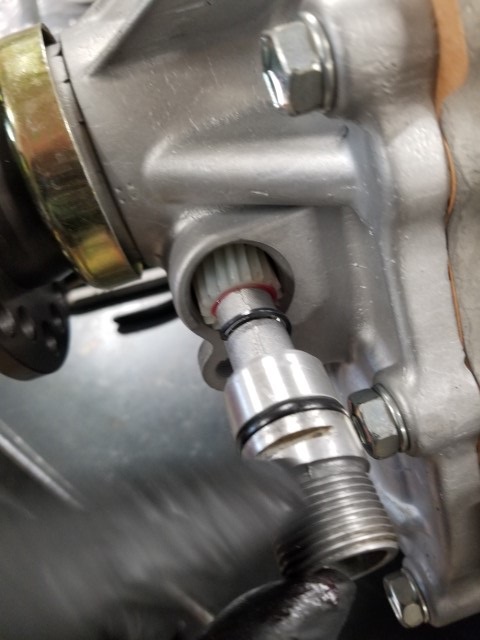
Now we install the flanges. Both flanges install the same. Apply oil or grease to the seal to prevent a dry start. Coat the inner flange splines with a little RTV to prevent leaks. Apply a little anti-seize onto the threads. Slip the flange on. It should go on easily. Using two long bolts and a bar torque to 90 ft-lbs. then dimple the nut!
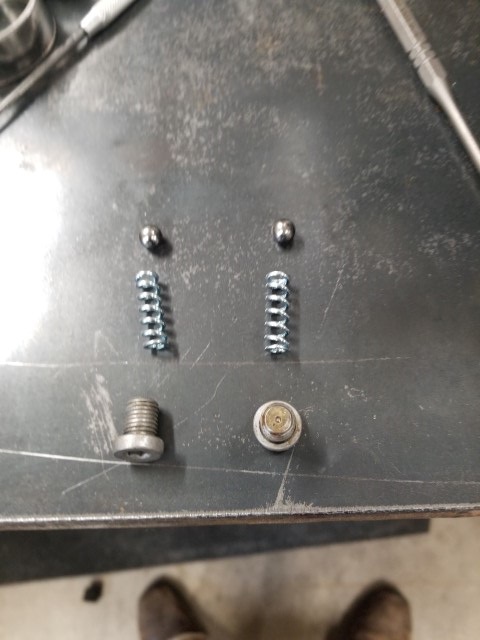
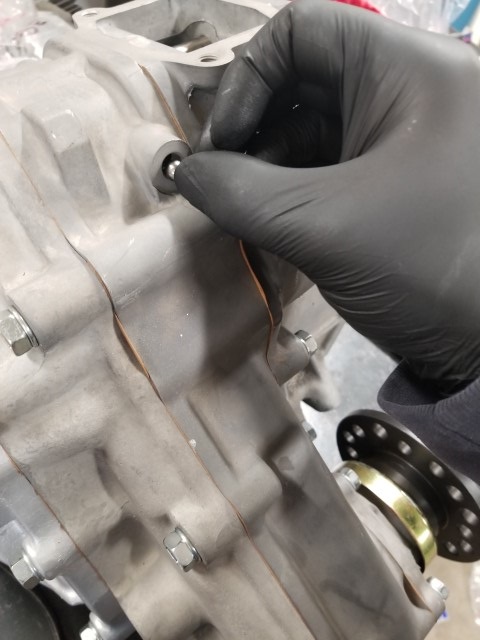
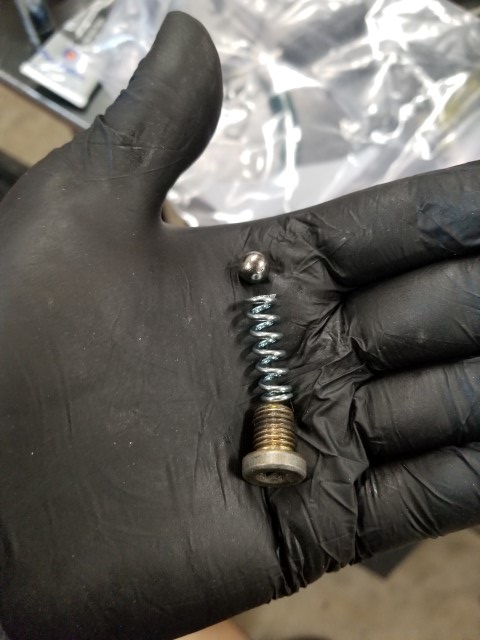
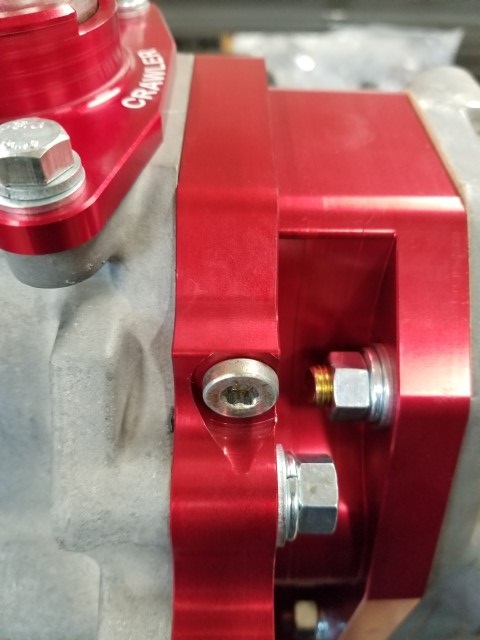
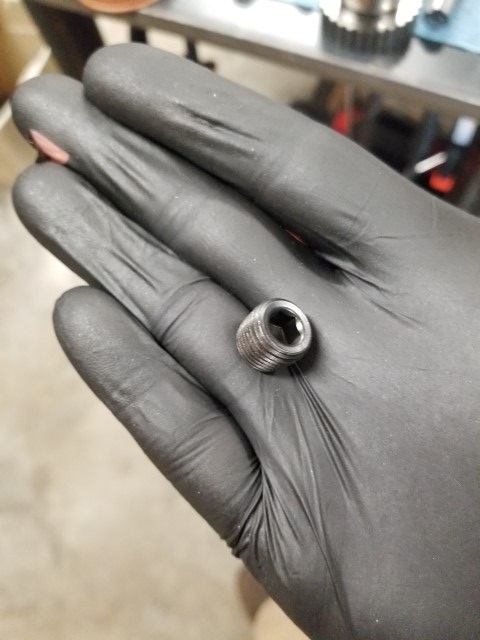
next we install the detent ball, spring, and plug. These are the Marlin HD spring. They are far better then the factory springs.They are installed on both sides of the housing. Ball first, then spring, then plug. I used a little loctite 242 to seal the threads.

Slip a new O-ring on the speedo assembly, then slip it into the housing. Use a dead blow to tap it down. Line the slot up with the housing and then install the retainer
BAM! You have now installed a set of low range gears and rebuilt a Toyota gear drive t-case (after 500 miles and an oil change)
If you are going to install a doubler, keep going if not reinstall and go wheeling!
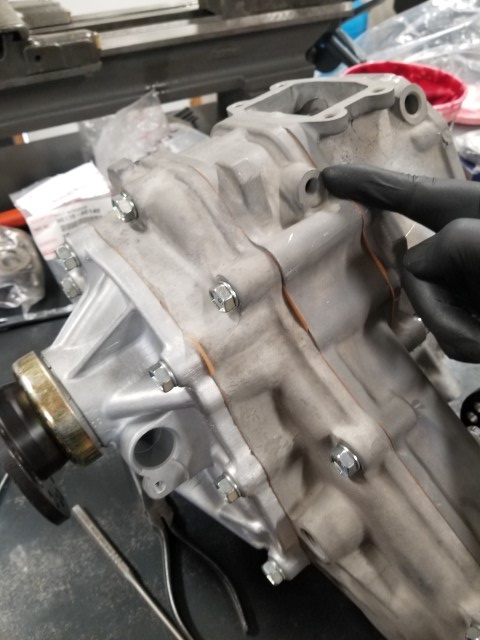
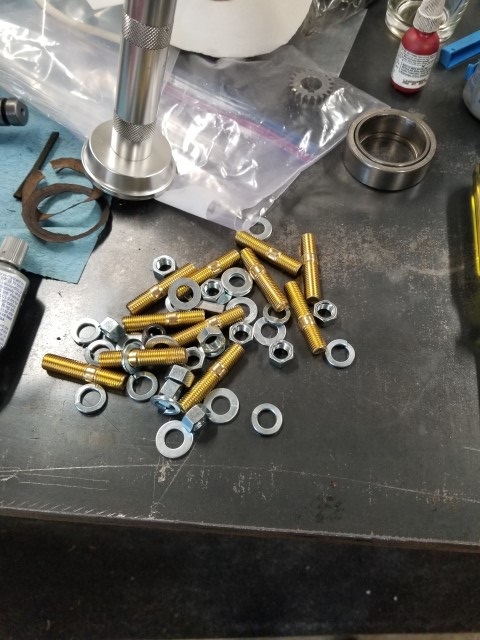
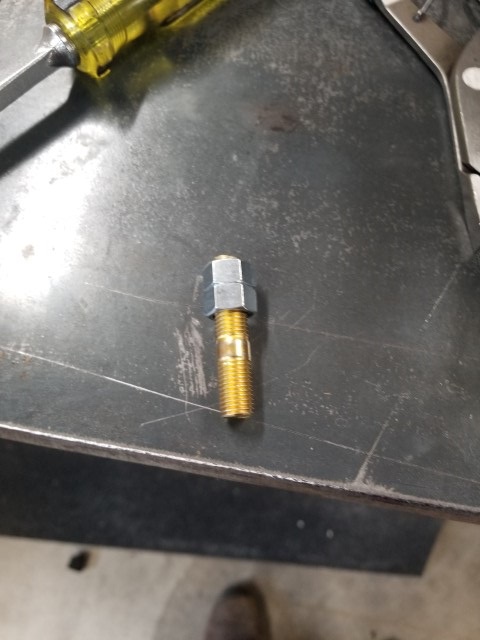
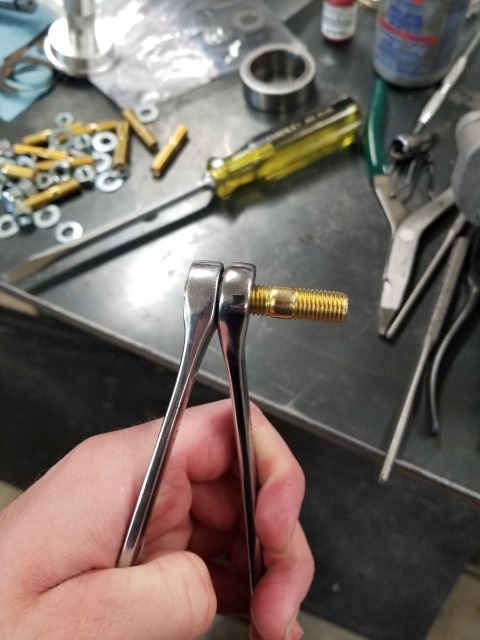
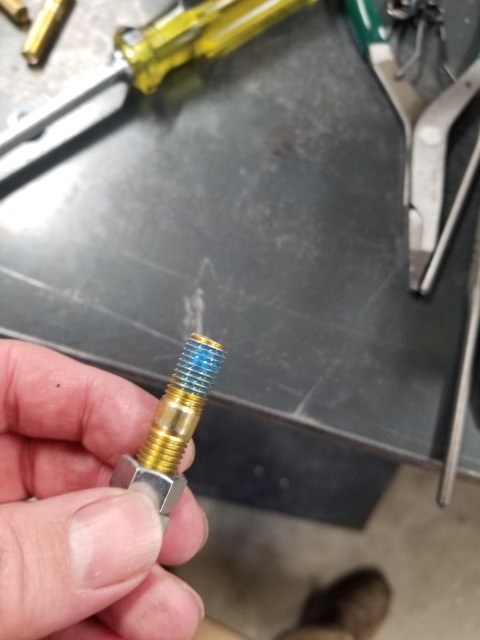
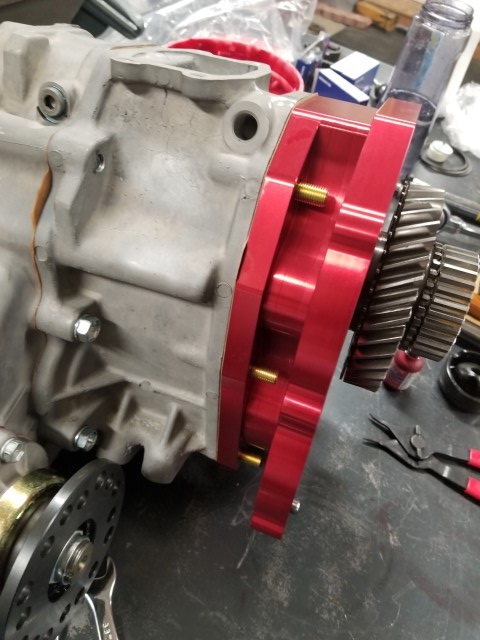
Next we install studs. I used the double nut method and a little loctite 242 to keep things in
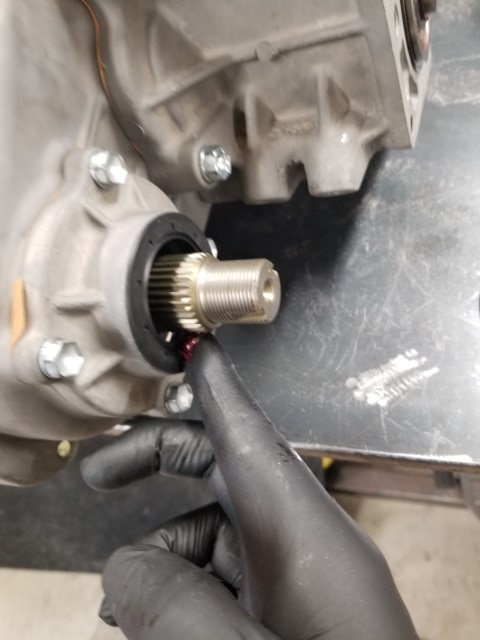
Fish the doubler coupler from the box from marlin. Add a little grease and slip the cage bearing and factory low range gear on.
Add a little grease to hold the detend and install the thrust spacer that comes with the kit.
Now slip the doubler onto the coupler. Make sure you slip it on the right direction. It shouldn't need any help slidding on.
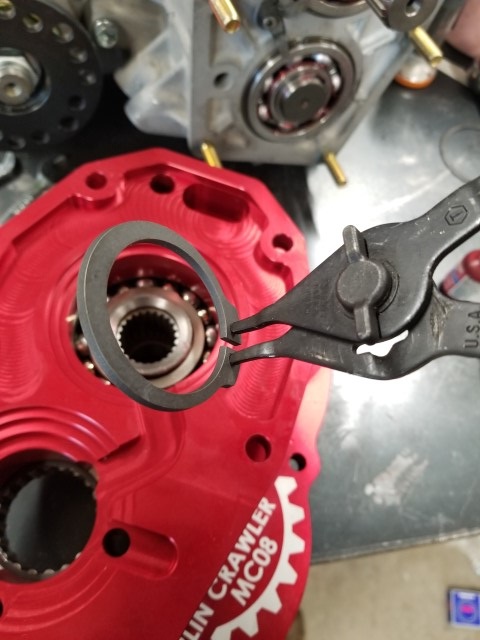
Once its slipped on. Use some snap ring plyers and install the snap ring.

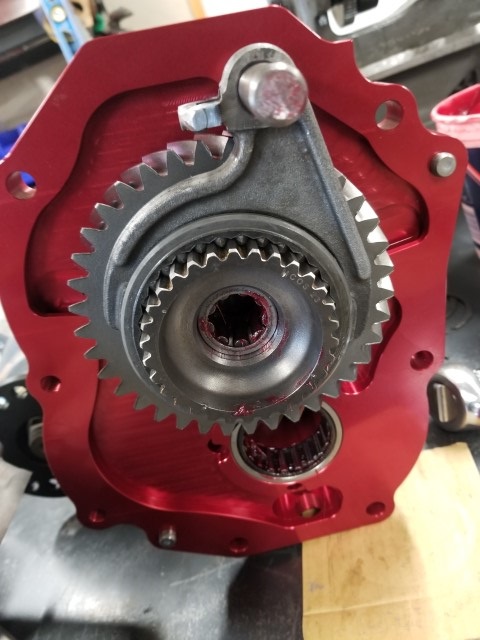
Put a MC gasket in the rear reduction housing and slip the doubler on
If you take the reduction idler gear apart here is all the parts. This extra ring is to quiet things down

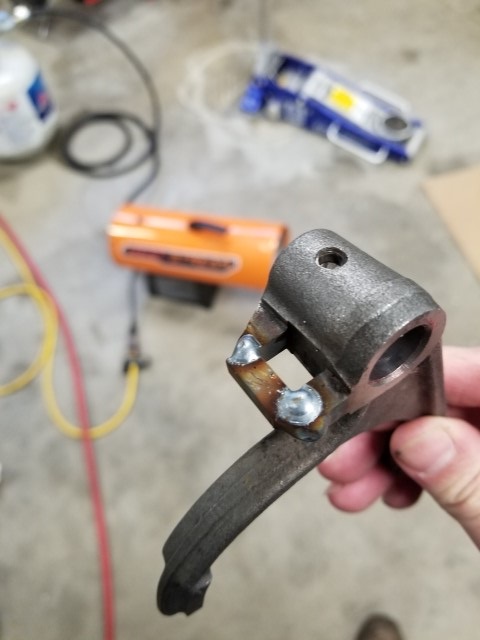
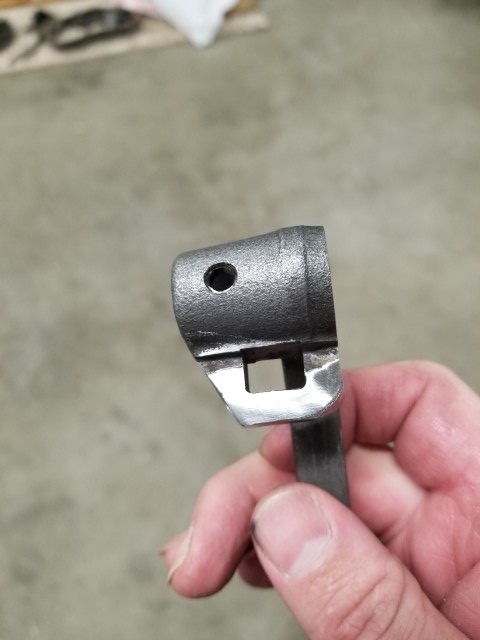
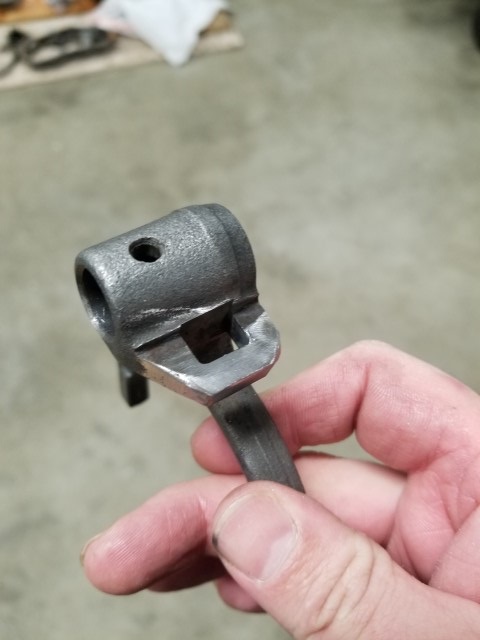
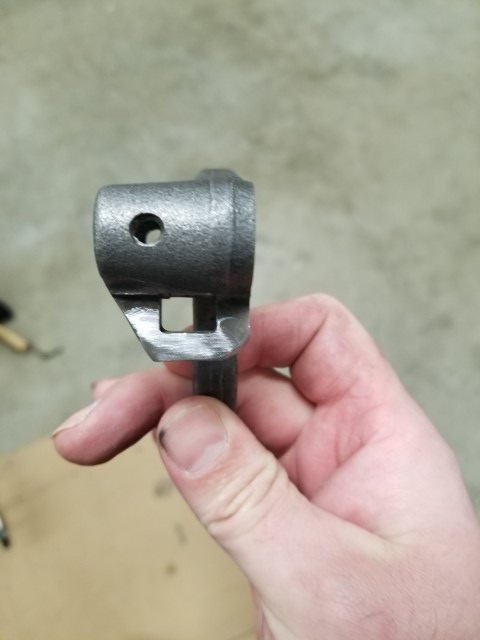
We must weld a retaining clip onto the shift fork. I welded it then ground things smooth. This keeps the shifter retained and from flopping around
Install the reduction housing shift rod and fork
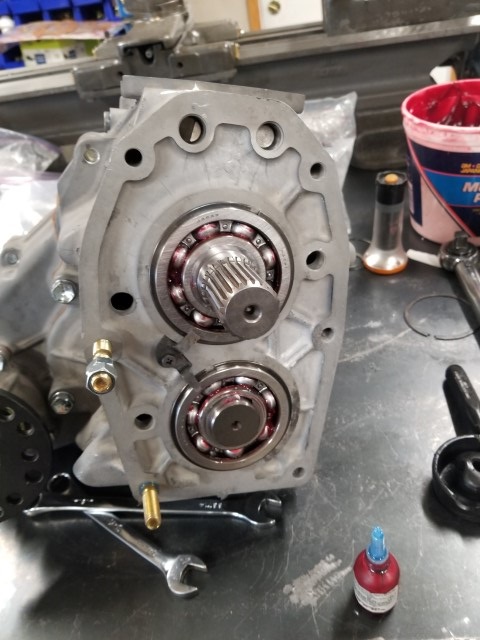
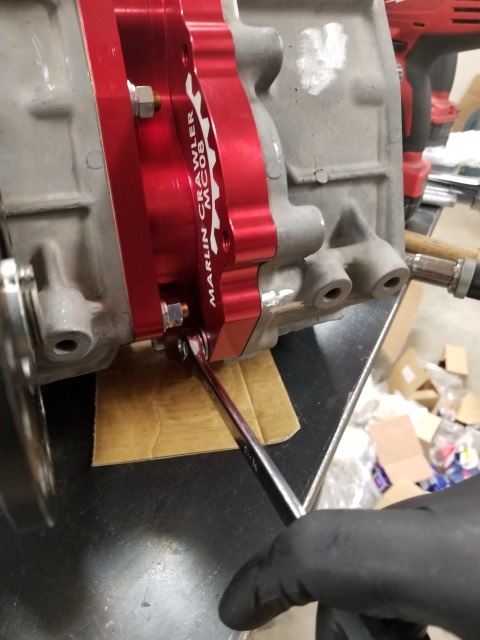
Install studs on the reduction housing, The top bolt hole is NOT used.

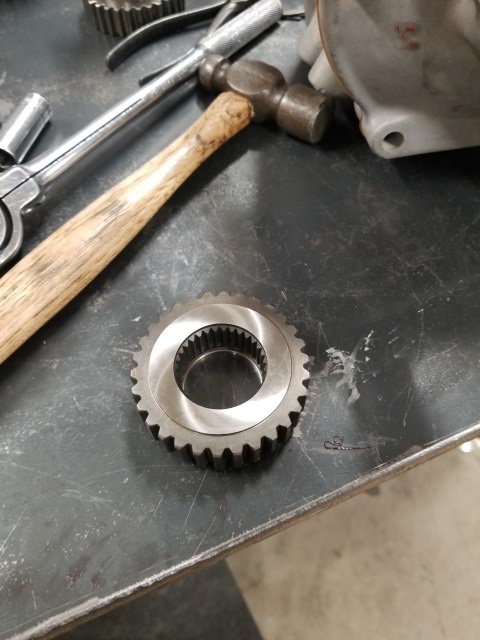
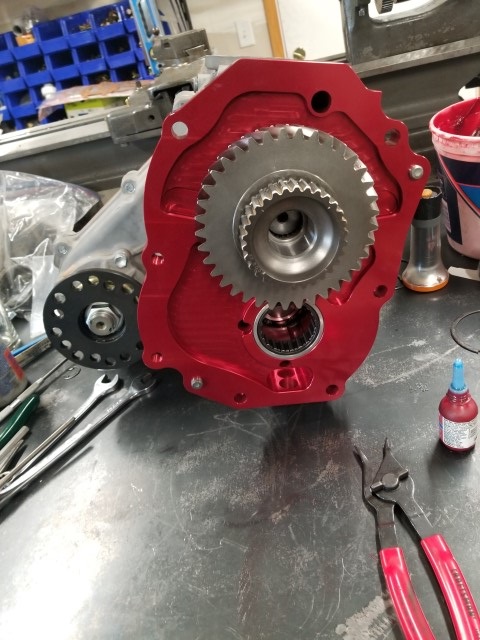
Now install a factory gear reduction into a reduction housing. Don't forget the input cage bearing

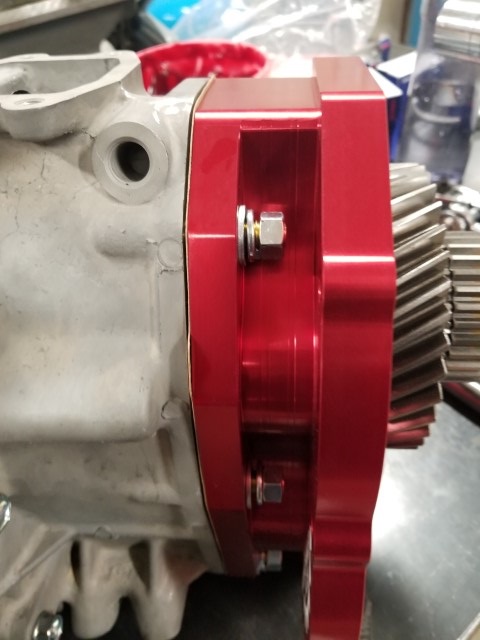
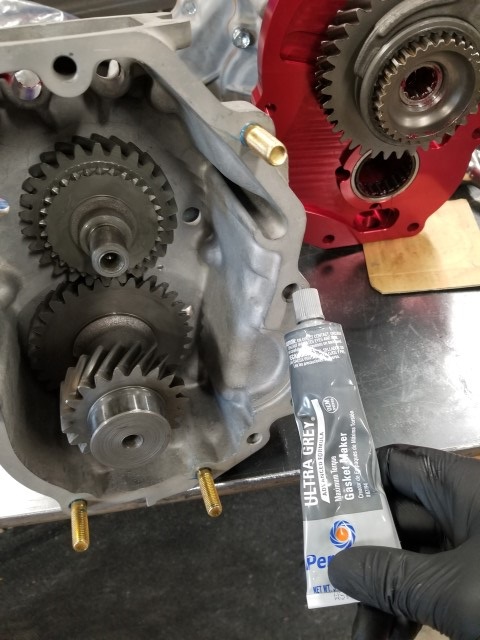
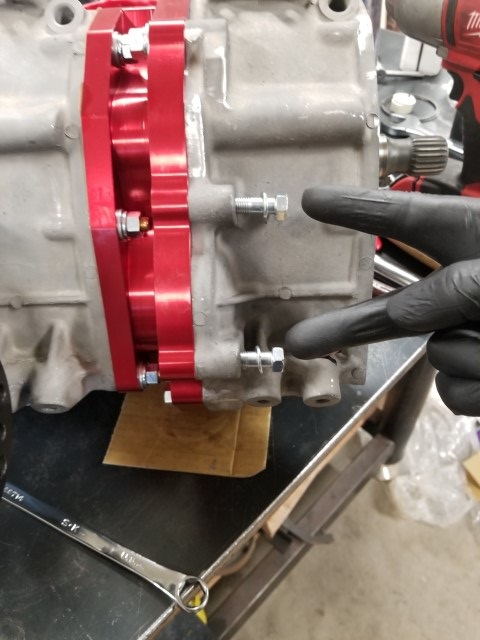
Put some RTV on the mating surfaces and slip the reduction housing on. Don't forget the two front bolts
Install the detent into the doubler

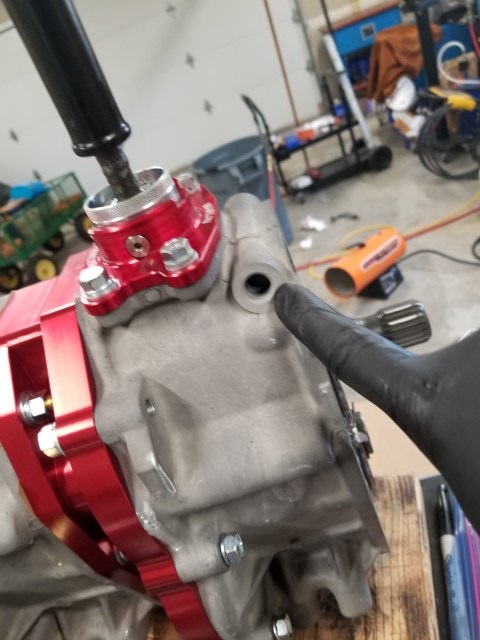
Install the plug into the front reduction housing where the 4wd indicator goes, as it isn't needed with the front case. I used some thread sealant

DONE!